KeblaOS
Disk Image
Created: 14th April 2025

Introduction
A disk.img is a disk image file — a complete byte-for-byte copy of a physical disk (like a hard drive, SSD, USB stick, or CD/DVD). It acts as a virtual disk, storing everything the physical disk would: partitions, boot records, filesystems, and data files.
🔧 Key Properties:
- It’s usually created using tools like
dd,qemu-img, or disk utilities. - It can contain bootable operating systems, file structures, or even custom partition schemes.
- Can be mounted as a loop device on Linux, or opened using tools like OSFMount on Windows.
🛠 Common Uses:
- Operating System Development: Used to test or install OS builds (like you’re doing in KeblaOS).
- Virtual Machines: Used by QEMU, VirtualBox, etc., as a virtual hard disk.
- Disk Cloning & Backup: Used to back up or restore exact disk states.
- Forensics & Analysis: Used to analyze disks without touching the original.
Overview
A disk image (disk.img) is a file that emulates a physical disk, containing all the data, partition tables, boot sectors, and filesystem metadata. Disk images are widely used for emulation, virtualization, OS development, backup, and software testing.
In this project, I am creating a disk.img inside the Disk directory, which will serve as a virtual disk drive for QEMU during the development and testing of the KeblaOS operating system.
The Makefile includes a command:
make build_disk
This command creates a 512 MB FAT32-formatted disk image and mounts it on the Disk/mnt directory.
This note demonstrates various use cases and steps related to working with disk.img.
📦 1. Creating a Blank Disk Image
We create a blank disk image of 512MB filled with zeros:
dd if=/dev/zero of=Disk/disk.img bs=1M count=512
🧱 2. Partitioning the Disk with MBR (Master Boot Record)
To add a partition table and create a FAT32 partition:
parted Disk/disk.img --script -- mklabel msdos
parted Disk/disk.img --script -- mkpart primary fat32 1MiB 100%
The 1MiB offset is to align the partition properly for performance and compatibility.
🔍 3. Check if disk.img Is Mounted
mount | grep disk.img
This command helps you verify if the image is already mounted.
🔄 4. Check Loop Device Associations
losetup -l
Output might look like:
NAME       SIZELIMIT OFFSET AUTOCLEAR RO BACK-FILE
/dev/loop0         0      0         0  0 /path/to/KeblaOS/Disk/disk.img
📌 5. Check Mounted Partition from Image
lsblk
Output (simplified):
loop0       7:0    0   512M  0 loop
️└─loop0p1 259:0    0   511M  0 part /mnt/disk
This tells us /dev/loop0p1 is the partition we want to mount.
🕵️ 6. Check Which Processes Are Using disk.img
sudo lsof | grep disk.img
Helpful when umount fails due to active use.
❌ 7. Unmount Disk Image (If Mounted)
sudo umount Disk/mnt || true
Use || true to avoid script failure if it’s already unmounted.
🔓 8. Detach the Loop Device
sudo losetup -d /dev/loop0 || true
This releases the loop device from the image file.
🛠️ 9. Mounting the Partition from disk.img
After partitioning, attach and mount it:
sudo losetup -fP Disk/disk.img
sudo mount /dev/loop0p1 Disk/mnt
📁 10. Browsing Contents Inside disk.img
Once mounted, you can directly browse or manipulate files inside Disk/mnt just like a normal filesystem.
-
- Check the partitions inside disk.img
fdisk -l disk.imgThis will show you if disk.img contains partitions and where they start (sector offset).
- Check the partitions inside disk.img
- Mount a specific partition inside disk.img
Suppose you found a partition starting at sector 2048. To mount it:
sudo mount -o loop,offset=$((2048 * 512)) disk.img /mntHere, 2048 is the sector number and 512 is the sector size in bytes.
- If it’s a raw filesystem (no partition table)
sudo mount -o loop disk.img /mnt - Use losetup (optional, advanced)
sudo losetup -fP disk.img # Associate loop devices lsblk # Check loop devices sudo mount /dev/loopXpY /mnt - 🪟 On Windows, or with GUI tools: Use OSFMount
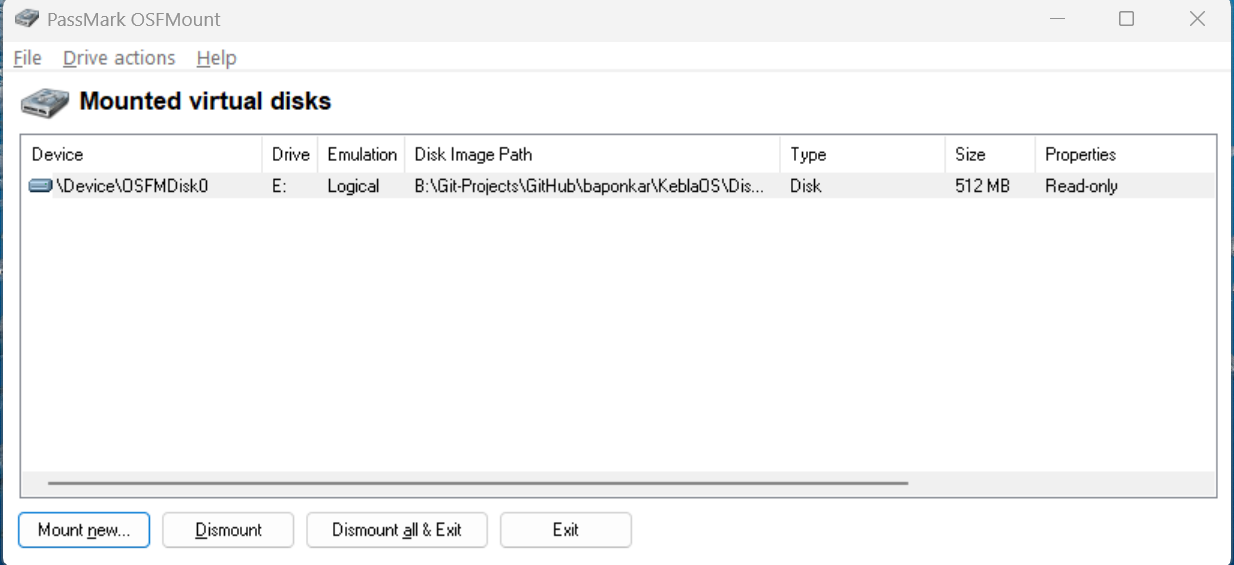
Free tool to mount .img files as a drive
Allows mounting individual partitions or whole image
Great for viewing FAT, NTFS, ext2/3 (with limitations)
🥪 11. Using disk.img with QEMU
You can use this image as a virtual hard disk:
qemu-system-x86_64 -drive file=Disk/disk.img,format=raw
✅ Summary
Disk images are essential for OS development. They simulate real disk environments, allowing for:
- Bootloader installation
- Filesystem formatting
- Kernel deployment
- Testing OS features without needing physical hardware
With tools like dd, parted, losetup, and mount, disk.img becomes a powerful part of your system programming toolkit.
© 2025 KeblaOS Project. All rights reserved.